
The membrane dispensing process sits at the heart of every lateral flow rapid test strip. Get it right, and antibody lines perform with consistent sensitivity and specificity across the full production run. Get it wrong, and even a well-formulated conjugate cannot rescue the result.
Yet this step receives far less documented attention than conjugate preparation or cassette assembly, which means manufacturing teams often rely on tribal knowledge rather than verified, written standards.
This article breaks down the four core parameters that production engineers and QC managers must define, measure, and control: line width, dispensing volume, line position, and the drying window. It also establishes a practical framework for first-article inspection and in-process inspection at the membrane dispensing station.
Why the Membrane Dispensing Process Determines Strip Performance
The C line (control) and T line (test) on a nitrocellulose (NC) membrane are not simply printed stripes. They are precisely deposited bands of capture antibody or antigen that must bind target analyte, or conjugate, at a specific rate and in a specific location as the sample migrates laterally through the membrane.
Four variables govern whether those bands function as designed:
- Line width: Affects signal intensity and the sharpness of the result band.
- Dispensing volume per unit length: Determines the functional protein density per millimeter of membrane.
- Line position (X/Y deviation): Controls the distance between C and T lines and their position relative to the sample pad and absorbent pad.
- Drying conditions: Locks the protein into the membrane matrix while preserving biological activity.
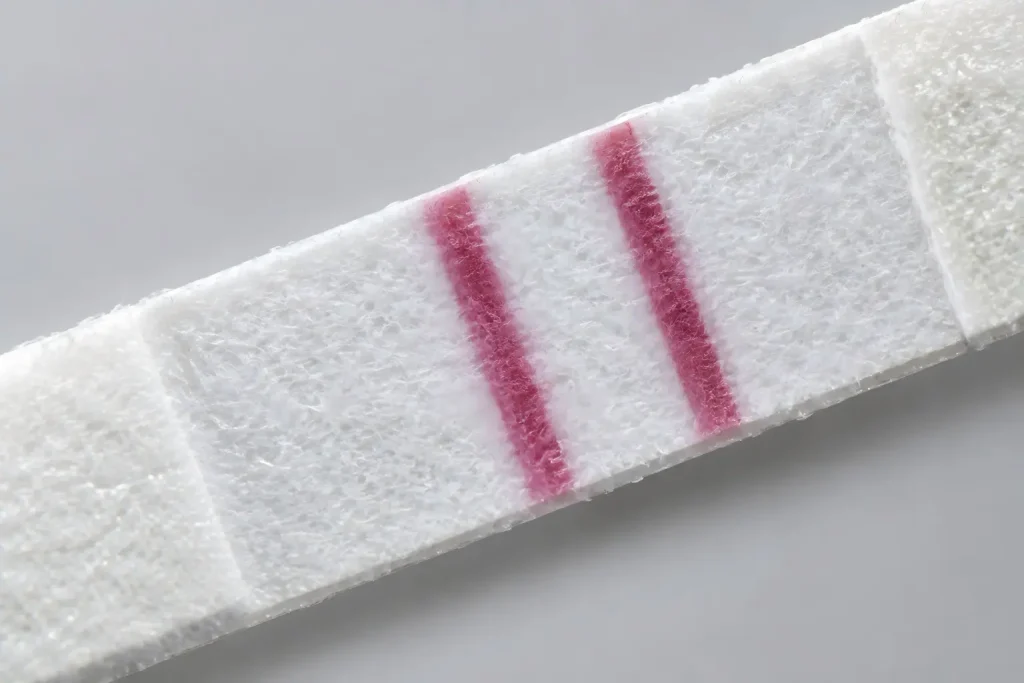
None of these parameters exist in isolation. Ambient humidity changes reagent viscosity. Viscosity shifts alter the spread radius of each dispensed droplet. Spread radius directly changes apparent line width and effective protein density. That cascade makes the membrane dispensing process a system, not a series of independent steps.
Equipment Parameters: Setting Up the C/T Line Dispenser
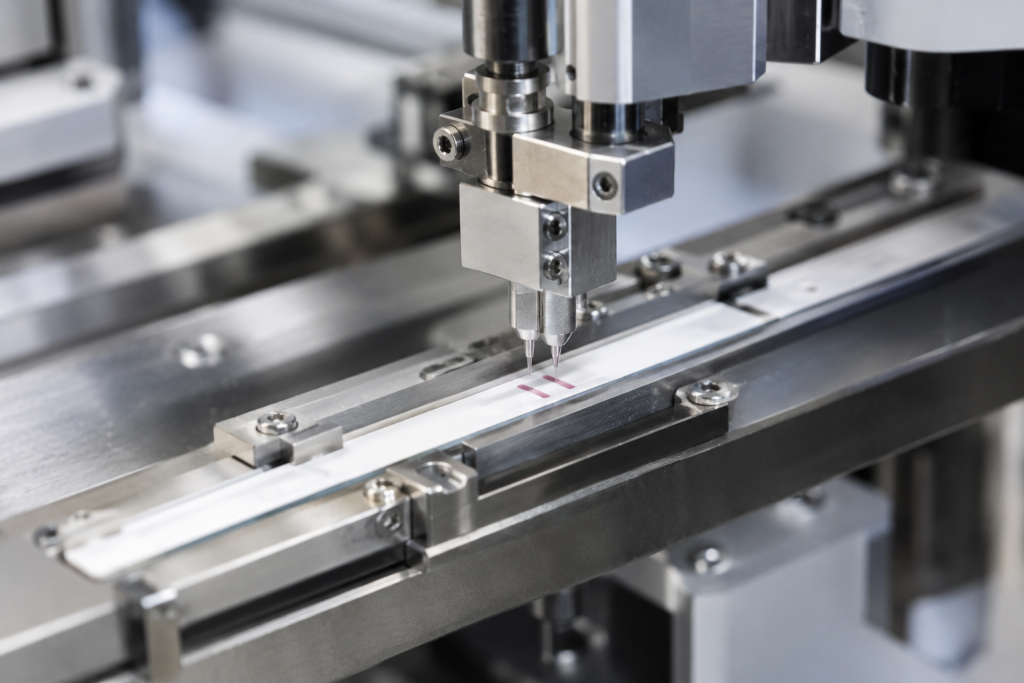
Modern lateral flow strip production uses non-contact piezoelectric or solenoid-valve dispensing heads. Before the first-article run, engineers must define and lock the following dispenser settings:
Dispensing speed: Measured in mm/s, the head travel speed across the membrane. Higher speeds reduce dwell time per unit length and lower the deposited volume. A typical working range falls between 20 mm/s and 60 mm/s, though the exact value depends on the validated volume target for a given formulation.
Back-pressure and nozzle diameter: Back-pressure (commonly 0.2–0.8 bar for solenoid systems) drives reagent through the nozzle. Nozzle inner diameter, typically 0.2 mm to 0.5 mm for IVD applications, sets the upper bound on droplet size. These two parameters must remain stable across the entire shift. Pressure fluctuations of ±0.05 bar can shift deposited volume by 5–10%, which falls outside acceptable in-process limits.
Line pitch: The distance between the C line and the T line, measured center-to-center. A common specification is 4.0 mm ± 0.3 mm, but each assay design carries its own validated pitch. Deviation from the specified pitch changes the visual distance between result lines on the finished cassette and can cause misread results in automated readers.
Document all dispenser parameters in the equipment setup record before each production run. Treat these settings as part of the batch record, not as background machine configuration.
Reagent Viscosity and Ambient Humidity: The Hidden Control Variables
Reagent viscosity and ambient humidity are the two process variables that production teams least often monitor rigorously, and both directly disrupt line width and deposited volume.
Reagent viscosity depends on protein concentration, buffer composition, and temperature. A 5°C rise in room temperature can reduce antibody solution viscosity by 8–12%, causing the dispensed droplet to spread further on the NC membrane surface. The result: a wider, thinner line with reduced protein density per unit area, which translates directly into signal loss, particularly for low-concentration analytes.
Measure reagent viscosity at the start of each dispensing session using a calibrated viscometer. Establish a specification window (for example, 1.5–3.0 mPa·s for a typical antibody formulation) and quarantine any lot that falls outside it before dispensing begins.
Ambient humidity acts on the NC membrane itself. Nitrocellulose is hygroscopic. At relative humidity above 60%, the membrane absorbs moisture, its pore structure relaxes, and reagent penetrates more deeply rather than staying at the surface. That penetration reduces surface-accessible antibody, the fraction available to bind analyte, and weakens the T-line signal. At humidity below 35%, static charge builds on the membrane, which can cause inconsistent wetting during the assay run.
Maintain dispensing room humidity at 40–55% RH. Install a calibrated hygrometer at bench level, not at ceiling level, because humidity stratifies in production rooms. Log readings at minimum once per hour during the dispensing shift.
Line Position Deviation: Specification and Measurement
Line position deviation describes how far the dispensed line lands from its nominal X (cross-membrane) and Y (along-strip length) coordinates. Both axes matter.
Y-axis deviation shifts the C or T line toward the sample pad or the absorbent pad. A shift of more than ±0.5 mm from the nominal position can alter the flow dynamics at the line because the distance from the conjugate pad changes the concentration profile of the migrating band when it reaches the line.
X-axis deviation tilts the line relative to the strip edge. A tilted line produces uneven intensity across the strip width, which causes false negatives or positives in any reader that integrates signal across a defined window.
Measure line position using a calibrated vision system or a flatbed scanner with image analysis software. Measure the first strip of every production run (first-article inspection) and one strip every 500 units during the run (in-process inspection). Record measurements in the batch record and flag any strip where position deviation exceeds ±0.5 mm on either axis.
The Drying Window: Time, Temperature, and Order of Operations
After the membrane dispensing process deposits the C and T lines, the strip enters the drying oven. Drying serves two functions: it removes residual water from the reagent formulation, and it physically bonds the protein to the nitrocellulose matrix through hydrophobic interaction.
Temperature: Most IVD manufacturers dry at 37°C for 30–60 minutes for standard antibody formulations. Temperatures above 50°C risk partial denaturation of the capture antibody, particularly for thermolabile proteins such as certain monoclonal antibodies raised against hormones or drug metabolites. Always validate the drying temperature for each specific antibody and NC membrane combination.
Airflow: Forced-air ovens with uniform airflow produce more consistent drying than static ovens. Measure temperature uniformity across the oven chamber (corner-to-center variation should stay within ±2°C) before qualifying the oven for production use.
Order of operations: The strip must reach the drying oven within a defined open-time window after dispensing, typically no more than 15–20 minutes. If strips wait longer, the reagent begins to wick laterally in the membrane, broadening the line and reducing peak protein density. Build this time constraint into the work instruction as a hard limit, not a guideline.
At Neo Nostics, we currently introduce automated dispensing equipment to replace manual-step variability in this stage. The goal is batch-to-batch CV ≤ 15% for both intra-batch and inter-batch precision, consistent with our validated production standards across a monthly output of 1.5 million tests. Automation reduces operator-to-operator variation in open-time compliance, which is one of the largest sources of within-batch line-width scatter in facilities that handle high SKU diversity.
First-Article and In-Process Inspection Standards
Every membrane dispensing run requires two formal inspection gates.

First-article inspection (FAI): Before releasing the run for full production, measure and record line width, line position (X and Y), and visual line continuity on the first three strips from each dispensing head. Acceptable criteria:
- Line width: nominal ± 0.2 mm
- C-to-T pitch: nominal ± 0.3 mm
- Y-axis position: nominal ± 0.5 mm
- Visual continuity: no breaks, satellites, or pooling across the full strip width
Reject the run and recalibrate the dispenser if any FAI strip fails any criterion.
In-process inspection (IPI): Sample one strip per 500 units (or every 30 minutes, whichever is shorter) and measure line position. Log all IPI measurements in the batch record with timestamp and operator ID. Implement a control chart for line position; a run of five consecutive measurements trending in one direction signals drift and requires immediate dispenser recalibration without waiting for an out-of-specification result.
These inspection standards align with ISO 13485:2016 requirements for process monitoring in medical device manufacturing, the same framework that governs our CE-certified product line.
Conclusion
The membrane dispensing process rewards engineers who treat it as a system: dispenser settings, reagent viscosity, ambient humidity, line position, and drying conditions all interact. Documenting each parameter, setting verified acceptance criteria, and building first-article and in-process inspection into the batch record converts a historically operator-dependent step into a controlled, repeatable process.
For OEM clients who need lateral flow strip manufacturing with documented process controls, validated batch records, and a production output of up to 1.5 million tests per month, contact Neo Nostics to request a factory audit or discuss your OEM requirements. Our engineering and QC team will walk you through our dispensing process controls, share first-article inspection templates, and discuss how our 5-working-day standard lead time supports your procurement schedule.


